I’ve used Ceph several times in projects where I needed object storage or high resiliency. Other than using VMs, it’s never something I can easily run on at home to test, especially not on bare-metal. Circa 2013, I tried to get it running on a handful of Raspberry Pi Bs that I had, but they had far too little RAM to compile Ceph directly on, and I couldn’t get Ceph compiling reliably on a cross-compiler toolchain. So I moved on with life. Recently, I’ve been looking at Ceph as a more resilient (and expensive) replacement for my huge file server. I found that it’s now packaged on Arch Linux ARM’s repos. Perfect!
Having that hurdle out of the way, I decided to get a 3 node Ceph cluster running on some Raspberry Pis.
The Hardware:
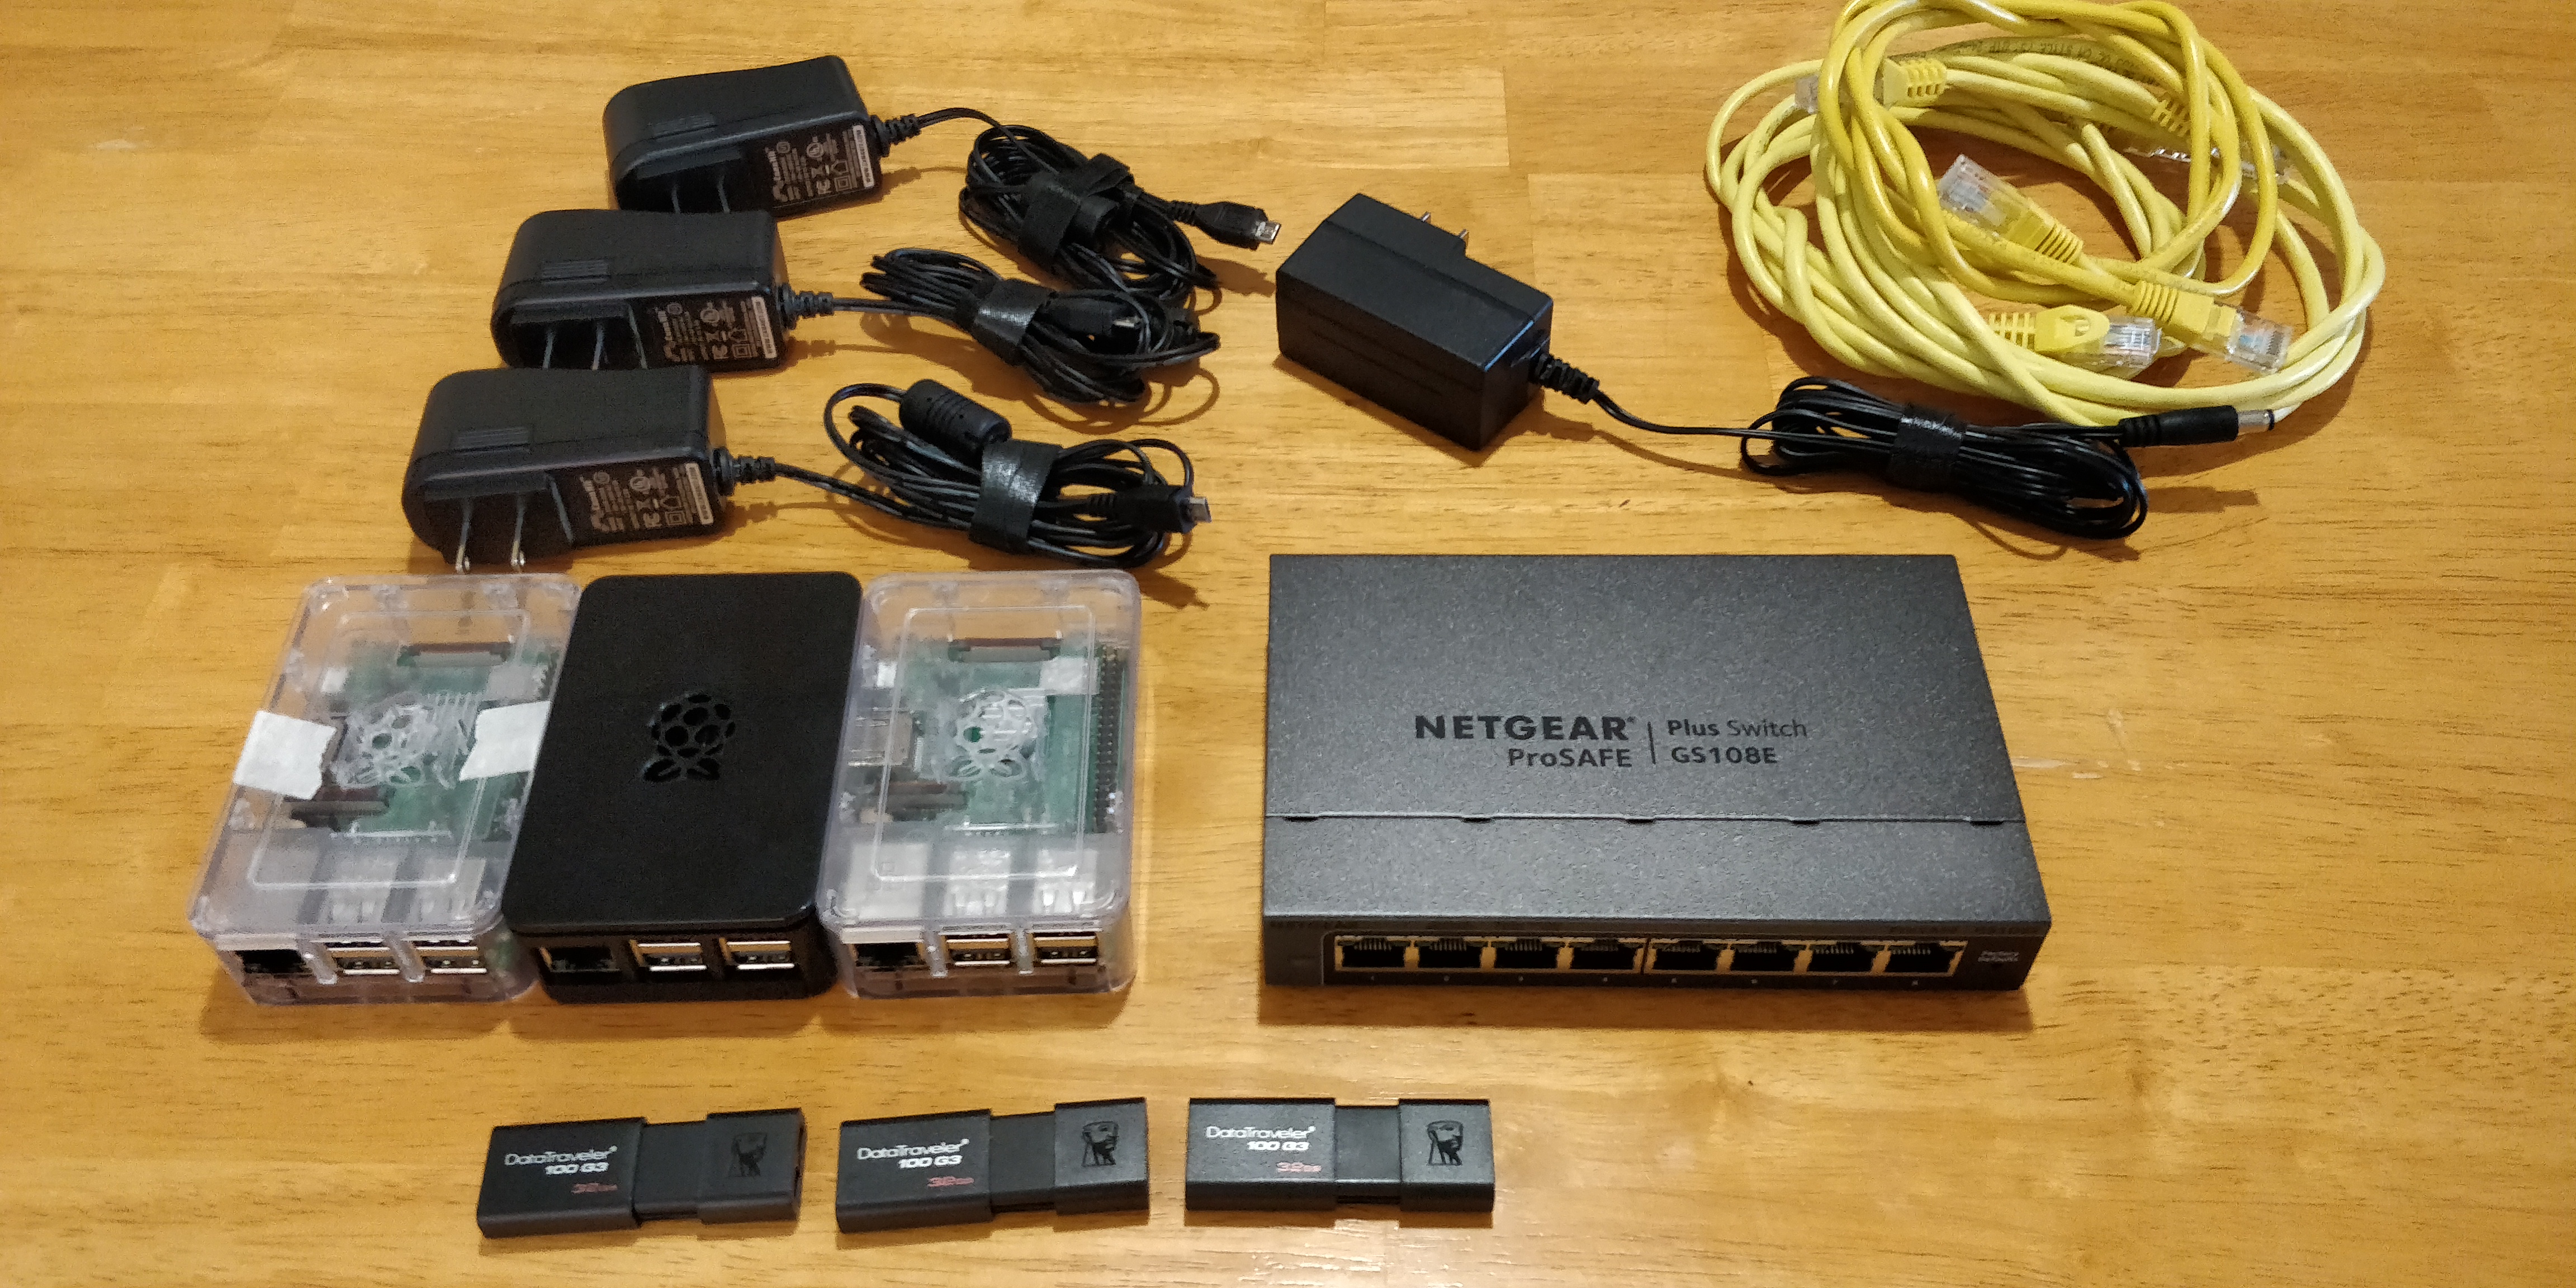
Hardware used in the cluster:
- 3x Raspberry Pi 3 B+
- 3x 32GB Sandisk Ultra microSD card (for operating system)
- 3x 32GB Kingston DataTraveler USB key (for OSD)
- 3x 2.5A microUSB power supplies
- 3x Network cable
- 1x Netgear GS108E Gigabit Switch and power supply
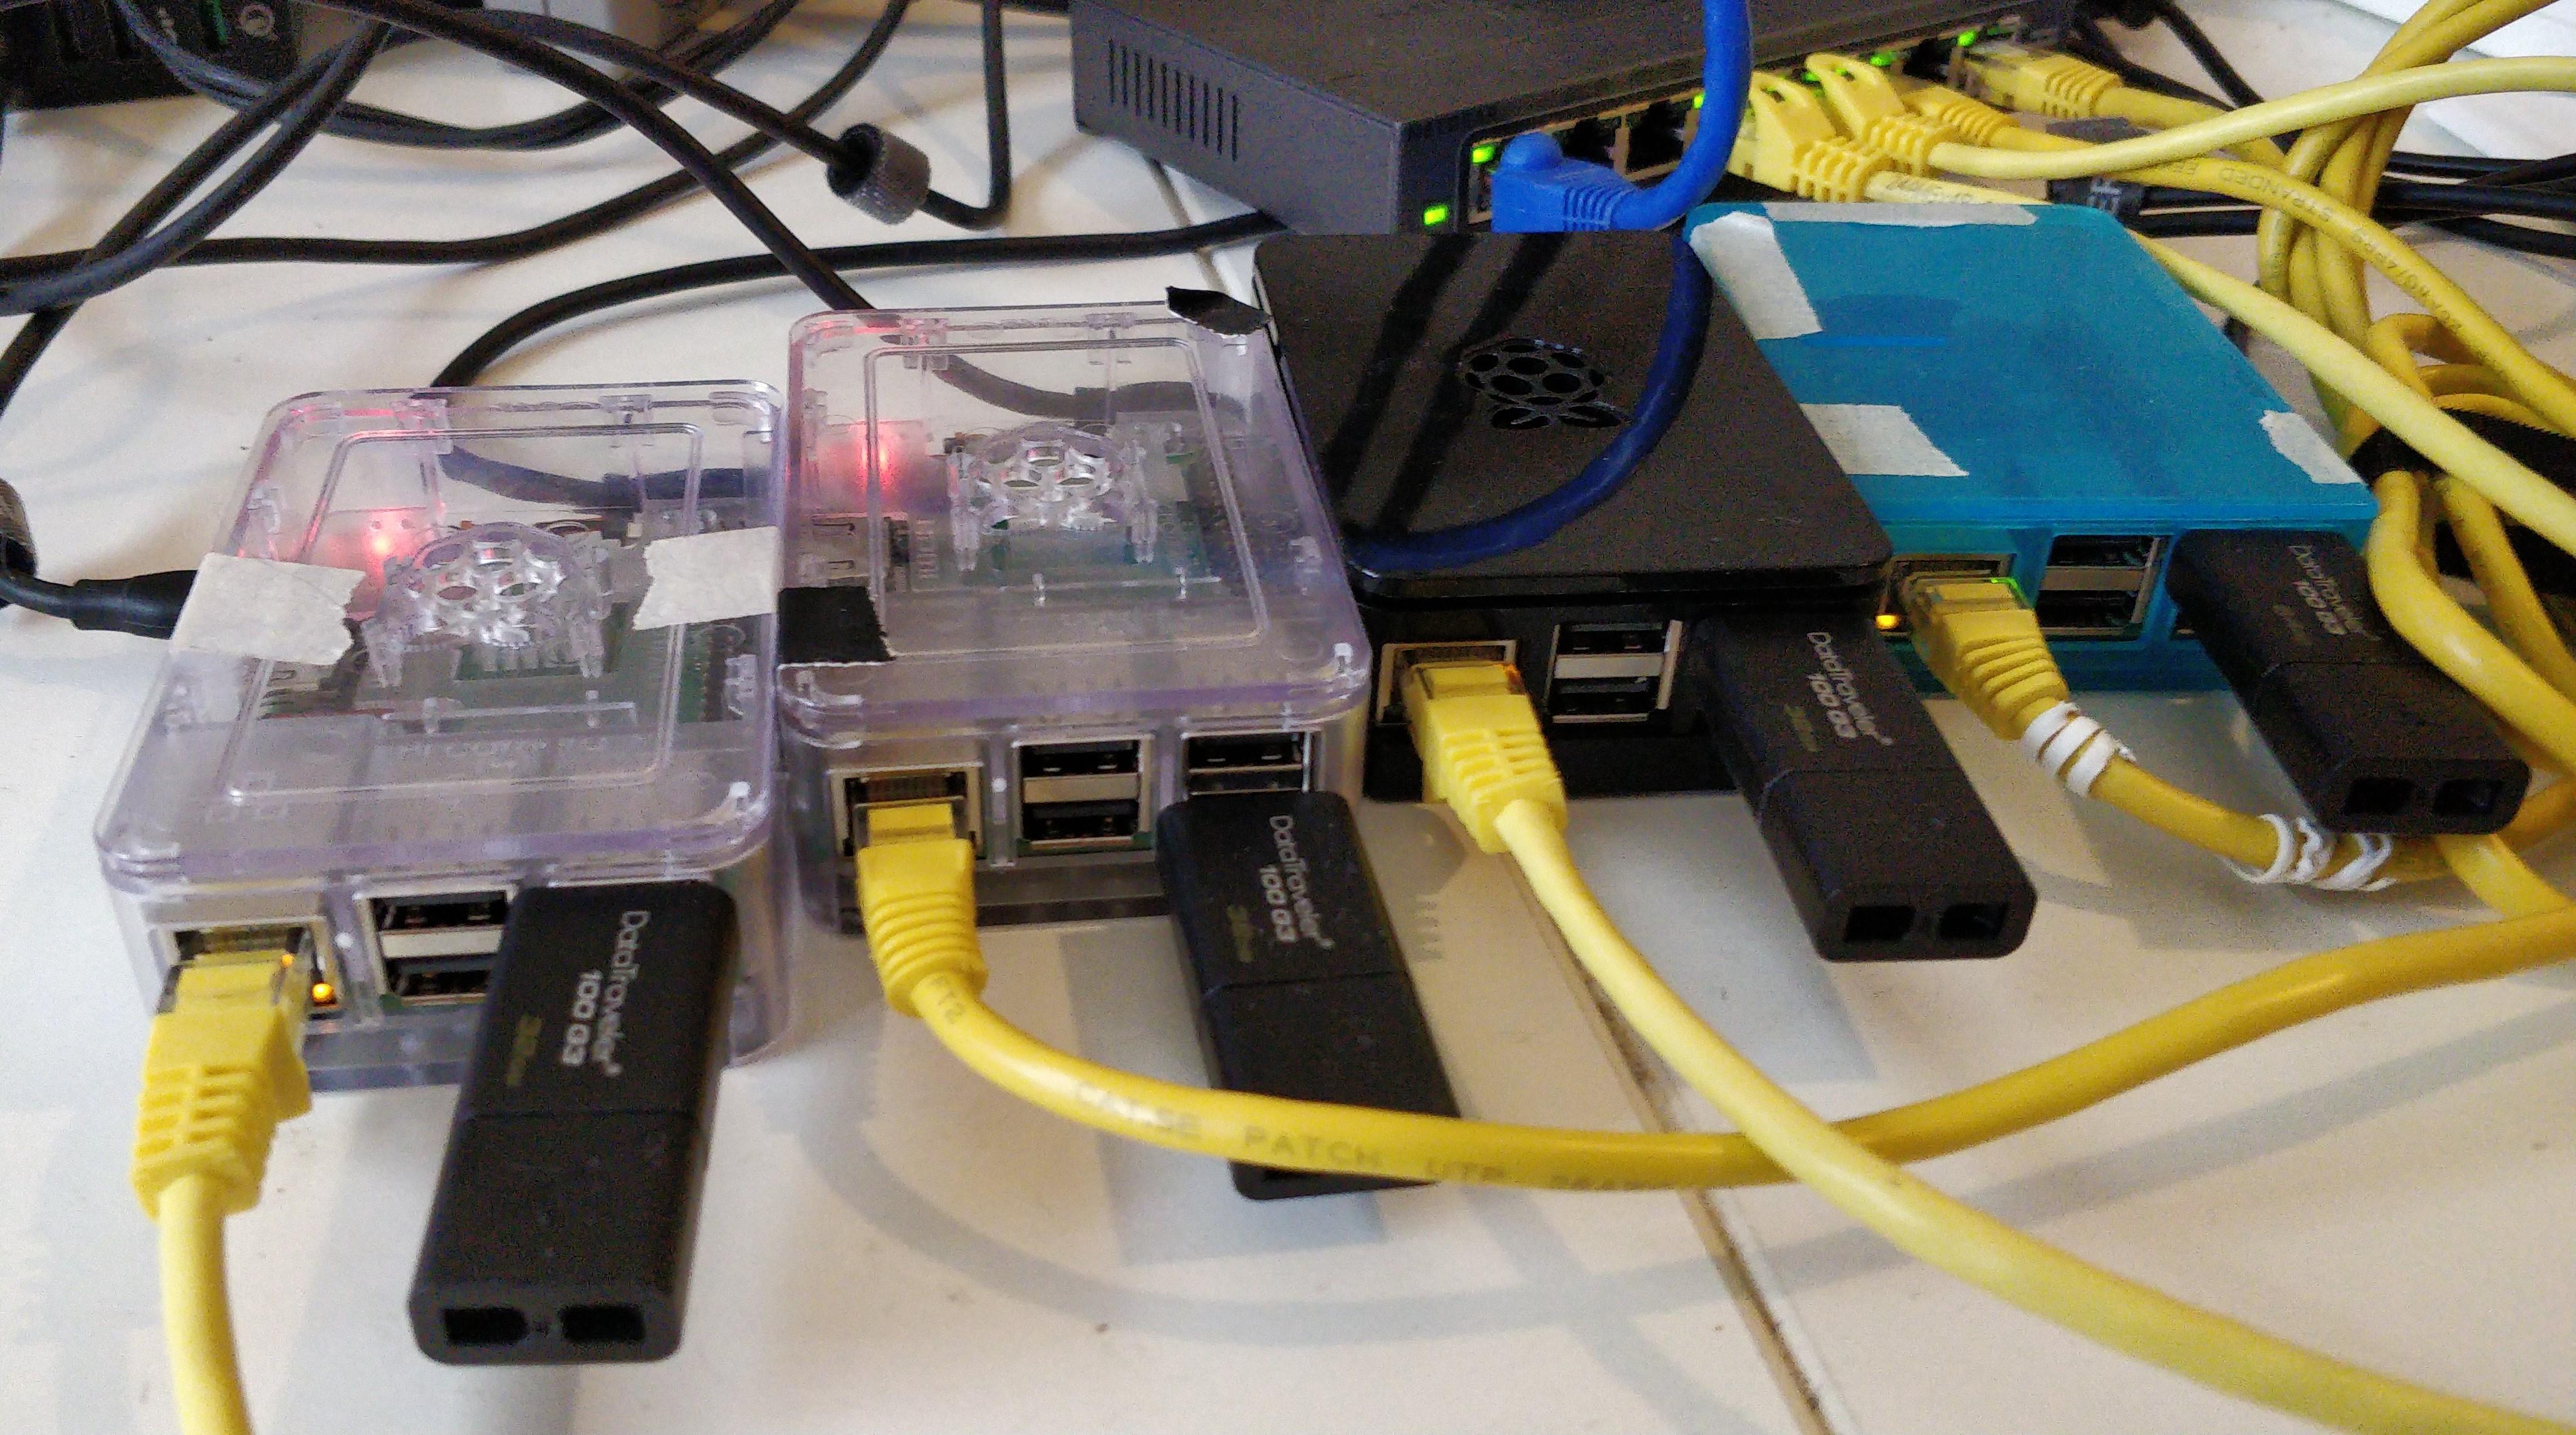
My plan is to have each node run all of the services needed for the cluster. This isn’t a recommended configuration, but I only have three Raspberry Pis to dedicate to this project. Additionally, I’m using a fourth Raspberry Pi as an automation/admin device, but it isn’t directly participating in the cluster.
Putting it all Together:
- Create a master image to save to the three SD cards. I grabbed the latest image from the Arch Linux ARM project and followed their installation directions to get the first card set up.
- Note: I used the Raspberry Pi 2 build, because the Ceph package for aarch64 on Arch Linux ARM is broken. I’m also using 13.2.1, because Arch’s version of Ceph is uncharacteristically almost a year old and I wasn’t going to try to compile 14.2.1 myself again.
- Once the basic operating system image was installed, I put the card into the first Raspberry Pi and verified that SSH and networking came up as expected. It did, getting a static IP address from my already configured DHCP server.
- I first tried to use Chef to configure the nodes once I got them running. Luckily Arch has a PKGBUILD for chef-client in the AUR. Unluckily, it’s not for aarch64. Luckily again, Chef is supported on aarch64 under Red Hat. I grabbed the PKGBUILD for x86_64, modified it to work with aarch64, built and installed the package.
- I created a chef user, gave it sudo access, generated an SSH key on my chef-server, and copied it to the node.
- At this point, I had done as much setup on the single node I had, so I copied the image onto the other two microSD cards, and put them into the other Pis.
- Chef expects to be running on a system that isn’t Arch Linux. After some time trying to get it working, I decided that I’d spent enough time trying to get it working.
- With Chef a bust, I moved on to Ansible and re-imaged the cards to start fresh.
- ceph-ansible initially worked better, due to Ansible being supported on Arch Linux, but the playbook doesn’t actually support Arch. I needed to make some modifications to get the playbook to run.
- With some basic configuration of the playbook ready to go, I got the mons up and running pretty easily. But osd creation failed on permissions issues. Something in the playbook was expecting a different configuration that Arch Linux uses. Adding the ceph user to the “disk” and “storage” groups partially fixed the permissions issues, but osd creation was still failing. Ugh.
Time for Manual Installation:
While part of my goal was to try some of the Ceph automation, chef’s and ceph-ansible’s lack of support for Arch Linux meant that I wasn’t really accomplishing my main goal, which was to get a small Raspberry Pi cluster up and running.
So I re-imaged the cards, used an Ansible bootstrap playbook that I wrote and referred to Ceph’s great manual deployment documentation. Why manually deploy it when ceph-deploy exists? Because ceph-deploy doesn’t support Arch Linux.
MONs:
MONs or monitors stores the cluster map, which is used to determine where to store data to meet the reliability requirements. They also do general health monitoring of the cluster.
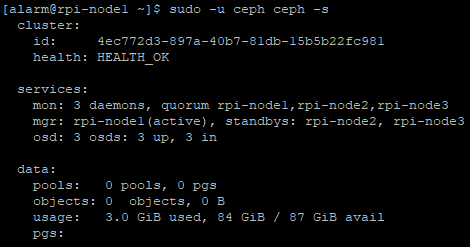
After following all of the steps in the Monitor Bootstrapping section, I had the first part of a working cluster, three monitors. Yay!
One difference from the official docs, in order to get the mons starting on boot, I needed to run systemctl enable ceph-mon.target in addition to the ceph-mon daemons, otherwise systemctl listed their status as Active: inactive (dead) and they didn’t start.
MGRs:
The next step was to get ceph-mgr running on the nodes with mons on them. The managers are used to provide a interfaces for external monitoring, as well as a web dashboard. While Ceph has documentation for this, I found Red Hat’s documentation more straight forward.
In order to enable the dashboard plugin, two things needed to be done on each node:
- First, run
ceph dashboard create-self-signed-certto generate the self-signed SSL certificate used to secure the connection. - Then run
ceph dashboard set-login-credentials username password, with the username and password credentials to create for the dashboard. - Running
ceph mgr servicesthen returned{"dashboard": "https://rpi-node1:8443/"}, confirming that things had worked correctly, and I could get the dashboard in my browser.
OSDs:
Now for the part of the cluster that will actually store my data, the OSD, which use the 32GB flash keys. If I wanted to add more flash keys, or maybe even hard drives, I could easily add more OSDs.
I followed the docs, adding one bluestore OSD per host on the flash key. One note, as I’d already tried to set the keys up using ceph-ansible, they did have GPT partition tables. I ran ceph-volume lvm zap /dev/sda on each host to fix this.
Additionally, I didn’t realize that the single ceph-volume command also sets up the systemd service, and I created my own. Now I had an OSD daemon without any storage in the cluster map. I followed Ceph’s documentation and removed the OSD, but now my OSDs IDs start at 1 instead of 0.
MDSs:
I plan on testing with CephFS, so the final step is to add the MetaData Server, or MDS, which stores metadata related to the filesystem. The ceph-mds daemon was enabled with systemctl enable ceph-mds@rpi-nodeN (N being the number of that node) and then systemctl enable ceph-mds.target so that the MDS is actually started.
Now What?
The cluster can’t store anything yet, because there aren’t any pools, radosgw hasn’t been set up and there aren’t any CephFS filesystems created.
If I had more Pis, I’d love to test thing with more complex CRUSH maps.
The next blog post will deal with testing of the cluster, which will likely include performance tuning. Raspberry Pis are very slow and resource constrained compared to the Xeon servers I’ve previously run Ceph on, so I expect things to go poorly with the default settings.
Results:
I split the results into two parts, the first includes test setup and RBD tests and the second will includes CephFS and radosgw tests as well as a conclusion.

This looks like an awesome project!
LikeLike